Back Brief Presentation:
For the back brief presentation as part of my addition for the group I added the group roles and tasks to the slides as well as creating one of the initial sketches of the gantt chart for our group. This was then finalized by Anthony into a powerpoint.


The whole back brief presentation can be seen here:
- - - - - - - - - - - - - - - - - - - - - - - - - - - - - - - - - - - - - - - - - - - - - - - - - - - - - - - - - - - - - - -
Materials Research:
I researched various sheet materials to use for this project including Laminated pine, Plywood and MDF. I came to the conclusion quite quickly that Plywood was the best and most suitable materials. In researching the material I also found out that there was different types of Plywood. These included Marine Grade Ply, Exterior Ply, Interior Ply and Treated Ply. All these had their pros and cons and I personally put forward the idea of using Marine Grade due to its ability to withstand the elements.
These are a few of the websites I researched to gather pricing details:
Almost all of the websites offered the various materials that the project was after. In terms of pricing they all tended to change depending on selected material and how much was needed.
Connection Methods & Research:
I researched various connection methods such as waffling and slotting techniques.
One of my inputs was to create a tensioning system that helped keep all the individual components together. It was chosen as one of the major connection systems by the group due to its practicality. As the work progressed we decided that tensioning of smaller sections of the bus stop would help with portability as well as helping with structure. The one final tension cable would be threaded through the entire Bus Stop for rigidity.


As a group we also drew up some sketches and tried to collectively gather how to keep the weight of the bus stop down. The images above display methods which we designed in order to complete this objective. These methods included cutting out various pieces from the sheets in strategically located places in order to keep the structure as perfect as possible.
- - - - - - - - - - - - - - - - - - - - - - - - - - - - - - - - - - - - - - - - - - - - - - - - - - - - - - - - - - - - - -
Prototype Models Initial Phase:
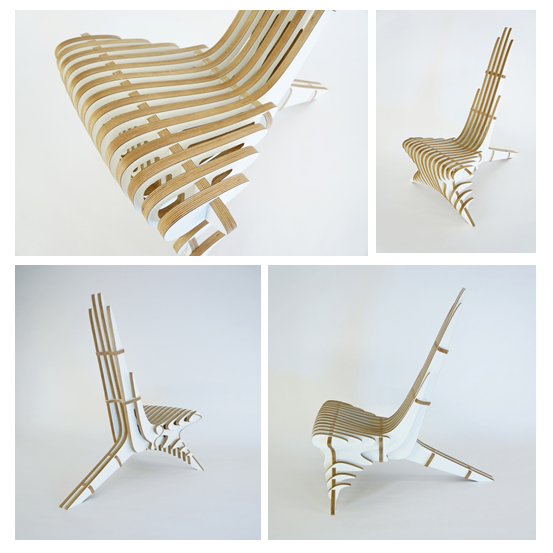
All the following images display our prototype models being laser cut and built. As part of these processes, I created the Illustrator file for the laser cuts of the first few images which enabled us to familiarise ourselves with the machine as well as create some initial models.
I then helped to laser cut some of the final files displayed in the final images that Martha created herself. I also helped to build the model, slotting all the pieces together with the rest of the group.


The following images display the final model that the group put together. The original files for laser cutting were made by Martha whilst I helped her to laser cut them in the Digital Fabrication Lab.


- - - - - - - - - - - - - - - - - - - - - - - - - - - - - - - - - - - - - - - - - - - - - - - - - - - - - - - - - - - - - - -
Laser cutting Videos
Initial Laser Cut Models Connections 1:
Finalised Laser Cut Models Connections 1:
Laser Cutting Prototype for intersection with 3D Printed Connection:
- - - - - - - - - - - - - - - - - - - - - - - - - - - - - - - - - - - - - - - - - - - - - - - - - - - - - - - - - - - - - -
Created the Google Document for our Communication Presentation:
I created the Google Document on Drive in order for the group to work on the parts individually when they wanted, yet also allowing everyone to have the up to date version due to Google Drive's qualities. It was only used as a stop gap measure until we got our wiki working but still allowed us to build on our communication presentation.

- - - - - - - - - - - - - - - - - - - - - - - - - - - - - - - - - - - - - - - - - - - - - - - - - - - - - - - - - - - - - -
Wiki Space:
I helped to make changes and updates to the wiki page that Kerre created, (my username being Olives94). This included uploading images as well as information for our Communication Collaboration Presentation. A couple of the edits shown were also made by Darren and Kerre using my computer when we met at Uni as a group.


- - - - - - - - - - - - - - - - - - - - - - - - - - - - - - - - - - - - - - - - - - - - - - - - - - - - - - - - - - - - - -
Created the Facebook Master Group:
In order for the two groups to work more efficiently I created the Facebook Master Group. This was also to accommodate the fact that after week 8 we were to work on things as one big group rather than 2. So this facebook group allowed us to keep in contact with each other while we all completed the tasks for the Bus Stop Of The Future Project.

- - - - - - - - - - - - - - - - - - - - - - - - - - - - - - - - - - - - - - - - - - - - - - - - - - - - - - - - - - - - - -
Connection Details:
As the project progress through to week 8 it became apparent that the project was lagging behind a bit. The group meeting with Hank and Elliot clarified the situation and the remainder of the semester was to be focused on finalising connection methods and parts.
As part of this I turned two of Hanks sketches into AutoCAD detailed drawings.


.jpg)
.jpg)
.jpg)
- - - - - - - - - - - - - - - - - - - - - - - - - - - - - - - - - - - - - - - - - - - - - - - - - - - - - - - - - - - - - -
Connection Details Models:
The following images are of the connection pieces that were 3D printed by Elliot Rosenberg. The details were gathered from the Minitec website. We have been searching that site to familiarise ourselves with the new connection method.


These following images are of some models that I laser cut and put together. The files were cut from the detailed drawings I created with reference to Hank's sketches. The file can be seen above, in drawing 2 of detail 6A. The laser cutting video is also posted above in the laser cutting section.


- - - - - - - - - - - - - - - - - - - - - - - - - - - - - - - - - - - - - - - - - - - - - - - - - - - - - - - - - - - - - -
Final Summation:
In terms of individual work I feel I have contributed greatly to the group. Yet in saying that my group was very well organised and we got along very well. As a result we all contributed great amounts of work. This includes making small inputs and changes to each others designs or models as well as help to create files for each other.
It will be evident that my individual contributions overlapped greatly with those of the rest of my group members in the rest of their blogs as we met many times as a group and delegated an individual to keep records and photographic evidence of our groups input.
No comments:
Post a Comment